How to Generate an Explainer Video From a Script
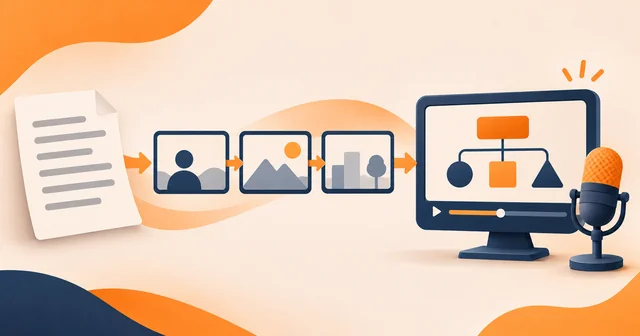
A good explainer video can make a tricky idea feel simple. Pictures, a clear voice and a well-paced story work together so viewers grasp a product, a process or a lesson without wading through pages of text. A new customer can learn how a smart thermostat works in the time it takes the kettle to boil. It all starts with a tidy script, which can then be turned into scenes that inform and hold attention.
1. Define the Purpose and Target Audience
Every video needs a clear job. Before any scene is built, the creator has to decide what the piece is meant to achieve, whether that’s introducing an idea, walking through a process, unpacking a technical subject or teaching a skill. A bank explaining a new savings app has a very different goal from a museum describing how fossils form. Knowing the aim makes it far easier to decide which points deserve the spotlight.
The audience shapes everything else. Their knowledge affects the wording, the speed and the look of the finished video. Newcomers usually need plain terms and a little extra hand-holding, while seasoned professionals tend to want more depth and less padding. A clip for curious ten-year-olds and one for hospital pharmacists can cover the same topic in completely different ways.
2. Organize the Script Into Clear Sections
Structure comes before production. A finished script needs a sensible shape, and most explainers work well with three simple parts: an opening, a main explanation and a close.
Each part has its own role. The opening names the topic and shows why it’s worth caring about. The middle lays out the key points in an order viewers can follow without effort. The ending brings the main message home and wraps things up neatly.
Long blocks of text are best broken into short chunks, each one becoming its own scene. A single idea per chunk keeps things focused, makes choosing pictures much easier and stops the screen from feeling cluttered. A paragraph that tries to cover pricing, setup and safety at once will only leave viewers dizzy.
3. Convert Script Sections Into a Storyboard
A storyboard is the bridge between words and pictures. It sets out, scene by scene, what viewers will see as the voiceover moves along. Many creators sketch theirs on sticky notes spread across the kitchen table.
Take a script about recycling as an example. The first scene might show a pile of empty bottles and cardboard boxes, and the next could follow a lorry collecting and sorting them. Later scenes might show the materials being processed and turned into something new.
A basic storyboard might list:
- Each scene’s number and rough length.
- The lines of voiceover that go with it.
- Ideas for images, illustrations or animation.
- Any on-screen text or key labels.
- How one idea flows into the next.
That bit of groundwork saves a great deal of head-scratching at the editing stage and keeps the video consistent from start to finish.
4. Select Suitable Visual Elements
Pictures need to earn their keep. Their job is to back up the script, not just fill empty space. Charts, diagrams, icons, photos, animated characters and short demonstrations each suit different kinds of information.
The choice depends on the message. Diagrams often make abstract ideas easier to grasp, while hands-on steps come alive through demonstration. A cooking school explaining knife skills will want close-up footage, not a pie chart. Sticking to the same colours, fonts and illustration style also gives the whole piece a polished, professional feel.
An AI video generator from text can turn written descriptions into rough first scenes. These tools can build visuals from prompts drawn straight from the script, though every result still needs a careful check to make sure it truly matches the intended message. A generated scene showing the wrong type of solar panel could quietly mislead an entire audience.
5. Prepare Clear and Natural Narration
The voiceover leads viewers through what they see. It works best when it sounds relaxed and moves at a pace that gives each point time to sink in. A narrator who rushes sounds like someone reading terms and conditions.
A few tweaks to the script often help before recording. Lines that read perfectly well on paper can sound clumsy out loud. Shorter sentences, everyday words and clear links between ideas usually make the narration far easier to follow. Reading the script aloud once in an empty room soon reveals the tongue-twisters.
Some creators record their own voice, while others turn to text-to-speech where it suits the project. Either way, pronunciation, volume, timing and clarity all need checking before the final edit.
6. Synchronize Audio and Visuals
With scenes and voiceover ready, the two need lining up. Each picture belongs on screen at the moment the narration talks about it. If a diagram has several steps, they can appear one by one as the voice explains each stage.
Music can lift the mood, but it must sit well below the spoken words. Sound effects can mark a key moment or change of scene, as long as they don’t pull focus from the explanation. A cheerful jingle drowning out the main point does more harm than good.
Timing matters just as much. Each scene needs to stay up long enough for viewers to take it in, without dragging. A chart that flashes past in two seconds frustrates people. One that lingers for twenty bores them.
7. Review and Refine the Final Video
The first cut is a draft, not a finished film. Watching it all the way through often reveals fuzzy explanations, pictures that don’t match the words, clumsy transitions and points made twice. Most creators wince at least once during that first viewing.
A thorough review might check:
- Whether the opening sets out the topic clearly.
- Whether the points follow a sensible order.
- Whether the pictures match what the voice is saying.
- Whether the text is easy to read on phones as well as larger screens.
- Whether the sound stays at a steady level.
- Whether the ending drives the main message home.
A fresh pair of eyes helps, too. Someone who knows nothing about the subject can quickly spot where more explanation is needed. A patient neighbour or a teenage nephew often makes the perfect test audience.
Conclusion
Turning a script into an explainer video takes more than adding moving images to written words. It means knowing the audience, sorting the information, building a storyboard, choosing fitting visuals, preparing the narration and reviewing the result with care. With attention at every step, a plain script grows into a lively, easy-to-follow film that gets the point across fast. The software can build the scenes. Only a thoughtful creator can make them tell the right story.