How to Take a Screenshot on a Mac (2026): Every Method
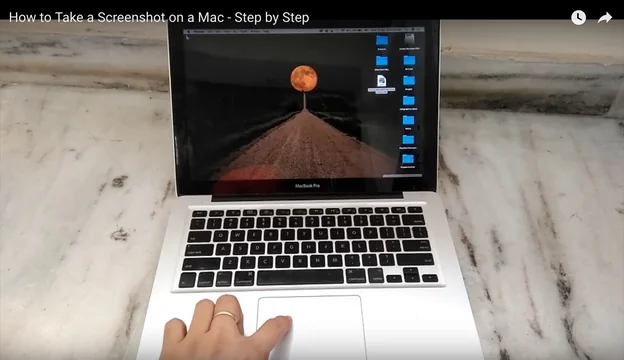
Taking a screenshot on a Mac takes one keyboard shortcut — but which shortcut depends on whether you want the whole screen, a selected area, or a single window. This guide covers every method built into macOS, where the files go, how to change that, and what to do when the shortcuts stop working.
Everything here applies to MacBook Air, MacBook Pro, iMac, Mac mini, Mac Studio and Mac Pro, and works the same on macOS Tahoe 26, Sequoia, Sonoma, Ventura and earlier releases unless noted.
Mac Screenshot Shortcuts: Quick Reference
| Shortcut | What it captures |
|---|---|
| Shift + Command + 3 | The entire screen |
| Shift + Command + 4 | A portion you drag to select |
| Shift + Command + 4, then Space | One specific window or menu |
| Shift + Command + 5 | Opens the Screenshot toolbar (capture + record + options) |
| Shift + Command + 6 | The Touch Bar (MacBook Pro models that have one) |
| Add Control to any of the above | Copies to the clipboard instead of saving a file |
If you only remember one, make it Shift + Command + 4 — it handles selections and, with a tap of the Space bar, windows too.
1. Capture the Entire Screen
Press Shift + Command + 3. The whole screen is captured immediately and saved to your desktop.
If you have more than one display connected, this creates a separate file for each screen — so a two-monitor setup produces two images from one keypress.
2. Capture a Selected Portion
Press Shift + Command + 4. The pointer becomes a crosshair with pixel coordinates. Drag to select the area and release to capture.
While you are still dragging, these keys change the selection:
- Hold Space — move the whole selection box without resizing it
- Hold Shift — lock every edge except the one you are moving
- Hold Option — resize from the centre outwards
- Press Esc — cancel without capturing
These are the difference between getting the crop right first time and taking the shot four times.
3. Capture a Single Window or Menu
Press Shift + Command + 4, then tap the Space bar. The crosshair becomes a camera icon. Move it over any window and it highlights — click to capture just that window, perfectly cropped, with a transparent background and a drop shadow.
This works on open menus and the Dock too: open the menu first, then press the shortcut.
To capture without the drop shadow, hold Option while you click. That is the fastest way to get a clean window image for documentation.
4. The Screenshot Toolbar (Shift + Command + 5)
Press Shift + Command + 5 to open the Screenshot app's floating toolbar. Available on macOS Mojave (2018) and every release since, it puts every option in one place:
- Capture — entire screen, selected window, or selected portion
- Record — entire screen or selected portion, as a video
- Options — save location, timer, whether to show the pointer, and whether to remember the last selection
The Options menu is where you set a 5- or 10-second timer, which is the only practical way to capture something that disappears when you move the mouse — hover states, tooltips and dropdowns.
5. Copy to the Clipboard Instead of Saving
Add Control to any shortcut and macOS puts the image on your clipboard rather than writing a file:
- Control + Shift + Command + 3 — whole screen to clipboard
- Control + Shift + Command + 4 — selection to clipboard
Then paste with Command + V straight into Slack, Mail, Notes, Pages or any image editor. If you routinely paste screenshots into chat and then delete the leftover desktop files, this shortcut is the fix.
Where Do Mac Screenshots Save?
By default, screenshots save to the Desktop as PNG files named Screenshot [date] at [time].png.
To change the location permanently: press Shift + Command + 5, click Options, and pick a folder under Save to — Documents, Clipboard, Mail, Messages, Preview, or Other Location for any folder you choose. A dedicated Screenshots folder keeps the desktop clean.
Changing the file format to JPG
PNG is the default and is the right choice for text and interface captures. If you need smaller files, open Terminal and run:
defaults write com.apple.screencapture type jpgkillall SystemUIServer
Replace jpg with png to revert. Other accepted values are pdf, tiff, gif and heic.
Editing and Annotating a Screenshot
After each capture a thumbnail appears briefly in the bottom-right corner. Click it to open Markup immediately — you can crop, draw, add arrows, insert text, redact, and sign, then hit Done to save over the original.
Ignore the thumbnail and it saves silently after a few seconds. To skip that preview entirely, turn off Show Floating Thumbnail in the Shift + Command + 5 Options menu.
You can also drag the thumbnail straight into an email, a Slack message or a folder without ever creating a desktop file.
Recording the Screen Instead
Press Shift + Command + 5 and choose Record Entire Screen or Record Selected Portion. Stop from the menu bar or with Control + Command + Esc. Recordings save as .mov files.
To capture audio, open Options and select a microphone before recording — macOS does not record system audio natively, so internal sound needs a third-party audio driver.
Watch: Two Screenshot Methods in Action
Troubleshooting: Screenshots Not Working
The shortcut does nothing
Open System Settings → Keyboard → Keyboard Shortcuts → Screenshots and confirm the shortcuts are enabled. Another app — often a screen-capture or conferencing tool — may have claimed the same combination. You can reassign them here, or click Restore Defaults.
The screenshot is black
This is DRM protection, not a bug. Streaming video in Safari or a protected app will capture as a black rectangle by design. There is no setting that changes this.
Screenshots are not appearing on the desktop
Check the save location under Shift + Command + 5 → Options — it may be set to Clipboard or another folder. Also check whether Show Items is enabled for the desktop, since Stage Manager and Desktop & Dock settings can hide desktop icons entirely.
A third-party app cannot record the screen
Grant it permission under System Settings → Privacy & Security → Screen & System Audio Recording, then quit and reopen the app.
Frequently Asked Questions
How do I screenshot on a Mac without a keyboard shortcut?
Open the Screenshot app from Applications → Utilities → Screenshot, or use Spotlight (Command + Space, type "Screenshot"). It gives you the same toolbar as Shift + Command + 5. Preview also offers File → Take Screenshot.
How do I take a screenshot on a MacBook Air or MacBook Pro?
Exactly the same shortcuts — Shift + Command + 3, 4 or 5. There is no difference between Mac models. On MacBook Pro models with a Touch Bar, Shift + Command + 6 additionally captures the Touch Bar itself.
Why do my screenshots have a white border?
That is the drop shadow macOS adds to window captures. Hold Option while clicking to omit it, or disable it permanently in Terminal with defaults write com.apple.screencapture disable-shadow -bool true followed by killall SystemUIServer.
Can I screenshot just one window on a Mac?
Yes. Press Shift + Command + 4, tap the Space bar, then click the window. macOS crops precisely to that window with a transparent background.
How do I screenshot a dropdown menu that closes when I click?
Use the timer. Press Shift + Command + 5, open Options, choose a 5- or 10-second delay, start the capture, then open your menu before the timer fires.
Where is the screenshot on my Mac?
By default, on your desktop, named "Screenshot" followed by the date and time. If it is not there, check Shift + Command + 5 → Options → Save to, since that setting persists once changed.
How do I change the default screenshot name?
Run defaults write com.apple.screencapture name "YourName" in Terminal, then killall SystemUIServer. New screenshots use that prefix instead of "Screenshot".
Verified on macOS Tahoe 26 in August 2026. All shortcuts also work on Sequoia, Sonoma, Ventura and Monterey; the Shift + Command + 5 toolbar requires macOS Mojave or later.