QR Code Generator Google
What Is a QR Code Generator Google Users Look For & How It Works (Step-by-Step)
A QR code is a square, scannable pattern that instantly sends people to information—like a website, text message, contact card, Wi-Fi login, payment link, or app download—without typing anything. A QR Code Generator Text is the tool that takes your content (for example, a URL or text) and turns it into that scannable code. People often search for a QR Code Generator Google option because they want something fast, familiar, and easy to use on any device.
Below is a clear, step-by-step guide to what a QR code generator is, how it works behind the scenes, and how you can create reliable QR codes for real-world use.
Step 1: Understand what a QR code generator actually does
A QR code generator performs one main job: it encodes data into a QR code pattern that camera scanners can decode.
It typically supports inputs such as:
-
Website URLs (https links)
-
Plain text (a note, instructions, an address)
-
Phone numbers (tap to call)
-
Email addresses (tap to email)
-
Wi-Fi credentials (scan to connect)
-
vCards (Digital Business Cards)
If you specifically need a QR Code Generator Text feature, that simply means you want the QR to open and display text directly when scanned—useful for short instructions, coupon codes, event details, or a quick message.
Step 2: Pick the “type” of QR code you need (static vs dynamic)
Before generating anything, decide which kind fits your use case:
Static QR codes
-
The QR code contains the final data (like a full URL or the text itself).
-
You can’t change the content after printing.
-
Usually free and simple.
Dynamic QR codes
-
The QR code points to a short redirect link controlled by a service.
-
You can update the destination later (swap the URL or content).
-
Often includes analytics like scan counts, location, and device type.
If you’re printing on packaging, posters, menus, or product labels, dynamic can save you if the destination changes later. For quick one-time use, static is usually enough.
Step 3: Enter your content carefully (this affects scan success)
A QR code generator needs clean input. Here are practical tips depending on the content:
For URLs
-
Use the full link starting with
-
Test the link in a browser first
-
Avoid overly long tracking links when possible (shorter often scans easier)
For text
-
Keep it short and readable
-
Use line breaks if the tool supports it
-
Avoid stuffing paragraphs into a QR unless you truly need it
This is where a QR Code Generator Text option becomes handy: it’s designed specifically for embedding text cleanly, instead of forcing your text into a URL.
Step 4: Generate the QR code (what happens behind the scenes)
When you click “Generate,” the tool doesn’t draw random squares. It applies a structured process:
-
Encoding: Your data is converted into binary (a compact machine-friendly format).
-
Error correction: Extra recovery data is added so the code still scans if it’s smudged or partially damaged.
-
Module placement: The generator places black/white squares (“modules”) according to the QR standard pattern.
-
Masking: A masking step improves readability for scanners by avoiding patterns that confuse cameras.
That’s why two QR codes pointing to different data can look very different, and why changing a single character changes the pattern.
Step 5: Choose the right error correction level
Many generators allow error correction settings (often labeled L, M, Q, H). Higher error correction:
-
Improves scanning even if the code is scratched or partly covered
-
Makes the QR denser (more squares), which can be harder to scan when printed very small
A simple rule:
-
Menus, posters, packaging → medium/high error correction is safer
-
Tiny labels → keep it moderate so the code doesn’t get too dense
Step 6: Customize carefully (without breaking scan reliability)
Some tools let you add:
-
Colors
-
Rounded corners
-
Logos in the center
-
Frames with “Scan Me”
Customization is fine, but follow these safety rules:
-
Keep strong contrast (dark code on light background works best)
-
Don’t invert colors unless you’ve tested it thoroughly
-
Don’t make the logo too large (center coverage can block key areas)
-
Keep a “quiet zone” (blank margin) around the QR code
If you’re creating something for customers, test on multiple phones (Android + iPhone) before you publish it.
Step 7: Test the QR code in real conditions
Testing is not optional—especially if you’re printing.
Test for:
-
Bright light and low light
-
Different camera apps (default camera + popular scanner apps)
-
Different screen sizes
-
Print size (if printed, test an actual print, not just on a monitor)
Also check the scan behavior:
-
Does it open instantly?
-
Does it show the correct content?
-
If it’s text, is it readable and formatted correctly?
Step 8: Download in the right format for your use
The format you choose affects quality:
-
PNG: great for digital use and basic printing
-
SVG: best for professional printing because it scales without blurring
-
PDF: often used for print layouts
If your QR looks blurry on screen, it will look worse on print—use SVG when possible.
A quick “wrap-up” before we go deeper
At this point, you know what a QR code generator does, how it encodes data, and how to create a QR code that scans reliably. The most common mistakes are using low contrast, printing too small, or skipping real-world testing. If you follow the steps so far, you’ll already be ahead of most people who generate a code once and hope for the best.
Step 9: How people use “google qr code generator” options
Many users search google qr code generator because Google-based tools feel convenient and trustworthy. Depending on what you mean, this could refer to:
-
Generating a QR code for a website link
-
Creating a QR code from within a browser experience
-
Using a Google-friendly workflow (like sharing a link from Google services)
The key idea is the same: you provide content (often a link), and the generator outputs a QR image. If you need advanced features like editable destinations and scan analytics, you’ll typically use a dedicated QR platform rather than a basic generator.
Step 10: Best practices for high-scanning QR codes
Use these practical guidelines:
-
Size matters: For print, bigger is safer. As a starting point, aim for at least ~2–3 cm (about 1 inch) square for close-range scanning, larger for posters viewed from a distance.
-
Distance rule: The farther people stand, the larger the QR must be.
-
Clear call-to-action: Add text like “Scan to view menu” or “Scan for directions.”
-
Place it where it’s easy to scan: Avoid corners, folds, glossy reflections, or curved surfaces when possible.
-
Use short, clean content: Especially for static QR codes.
Step 11: Common problems and how to fix them
Problem: It scans sometimes, not always
-
Increase contrast
-
Increase size
-
Improve lighting or reduce glare in placement
Problem: It scans but opens the wrong thing
-
Double-check input (typos in URLs are very common)
-
If dynamic, verify the redirect settings
Problem: It won’t scan after printing
-
Use SVG or high-res PNG
-
Avoid compressing the image
-
Make sure the printer didn’t blur the edges
Problem: Text QR looks messy
-
Shorten the text
-
Add line breaks
-
Use a QR Code Generator Text mode designed for readability
Step 12: When to use QR codes (and when not to)
QR codes are perfect when you want fast mobile access with minimal friction:
-
Events, tickets, registrations
-
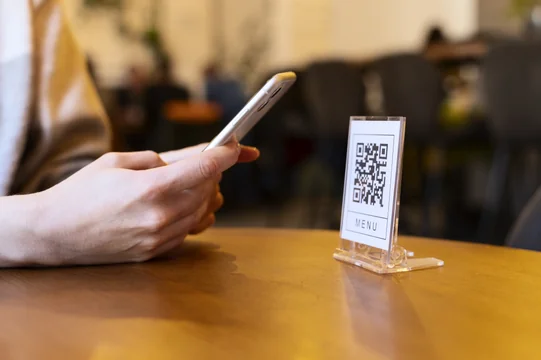
Menus, brochures, flyers
-
Product authenticity checks
-
Social profiles or portfolios
-
App downloads or sign-up pages
But they’re not ideal when:
-
Your audience won’t have a phone handy
-
The destination is something people must trust but doesn’t look trustworthy
-
The environment is hard to scan in (very low light, heavy reflections, very small prints)
In those cases, include a short readable URL alongside the QR.
Final step: Put it into action
To use a QR code generator effectively, think in this order: choose the QR type → enter clean content → generate → test → export correctly → deploy with good placement. Whether you’re exploring a QR Code Generator Google style workflow or using a specialized tool, the success of a QR code is less about the generator and more about practical choices: contrast, size, error correction, and testing. Do those well, and your QR codes will scan smoothly for real people in real situations.